Github PagesからNetlifyに移行【備忘録】
これまではこのサイトをGithub Pagesでホスティングしてきた。
プライベートリポジトリのままサイトをホスティングするにはGithub Proプランに入っている必要があるため、この度Netlifyに移行することにした。
現状
- Github Proプラン (やめる予定)
- Github PagesのJekyllでビルド
- Github Pagesでホスティング
- 独自ドメイン使用
- Cloudflare Registrar
- DNSサーバーもCloudflare
- サブドメイン
- ドメインをレポジトリに紐付けた
目標 (やりたいこと)
- Github Freeプラン
- 既存の独自ドメインを継続する
- プライベートリポジトリの内容をNetlify上でホスティングする
- Github actionsを使ってJekyllでBuild
最後の項目「Github actionsを使ったbuild」を行う理由は、Netlifyでビルドを繰り返した場合勝手に請求されてしまう仕組みのため。
Github actionsでは、無料枠を超えたらビルドをしなくなる仕様のため安心。
参考
手順
リポジトリからSiteの作成 (Netlify)
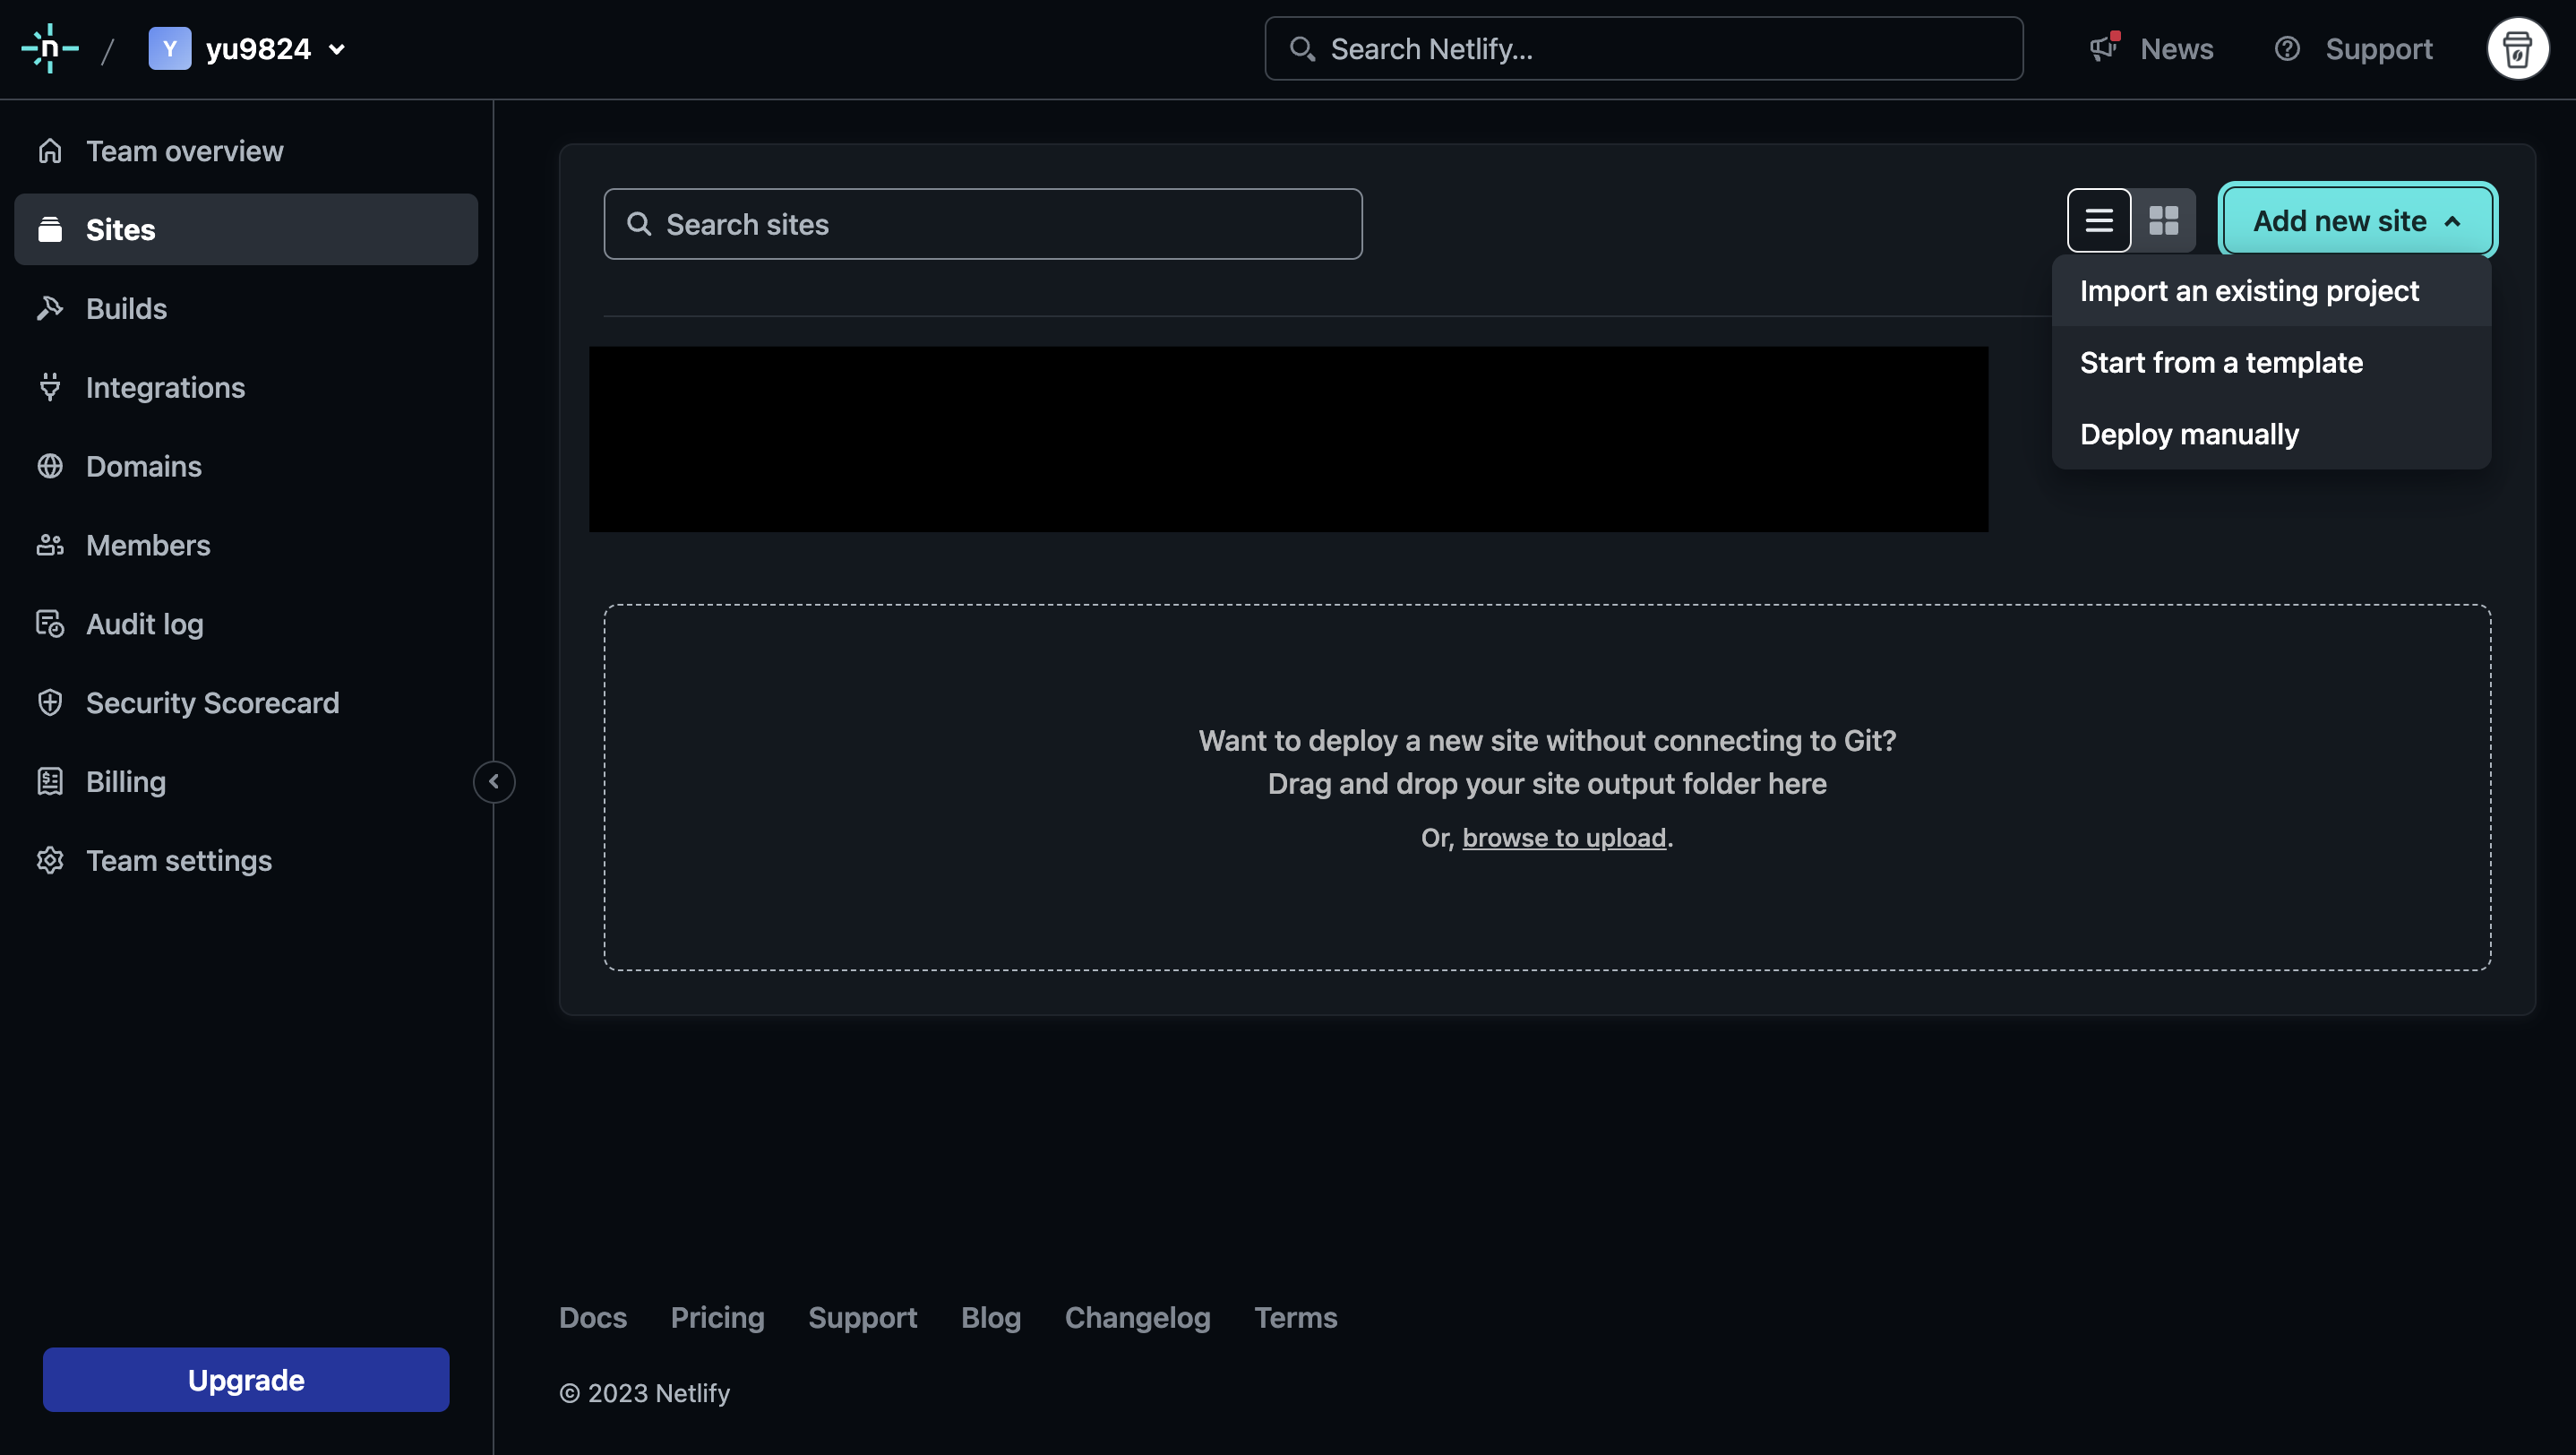
NetlifyにサインインしてSiteを作成する。
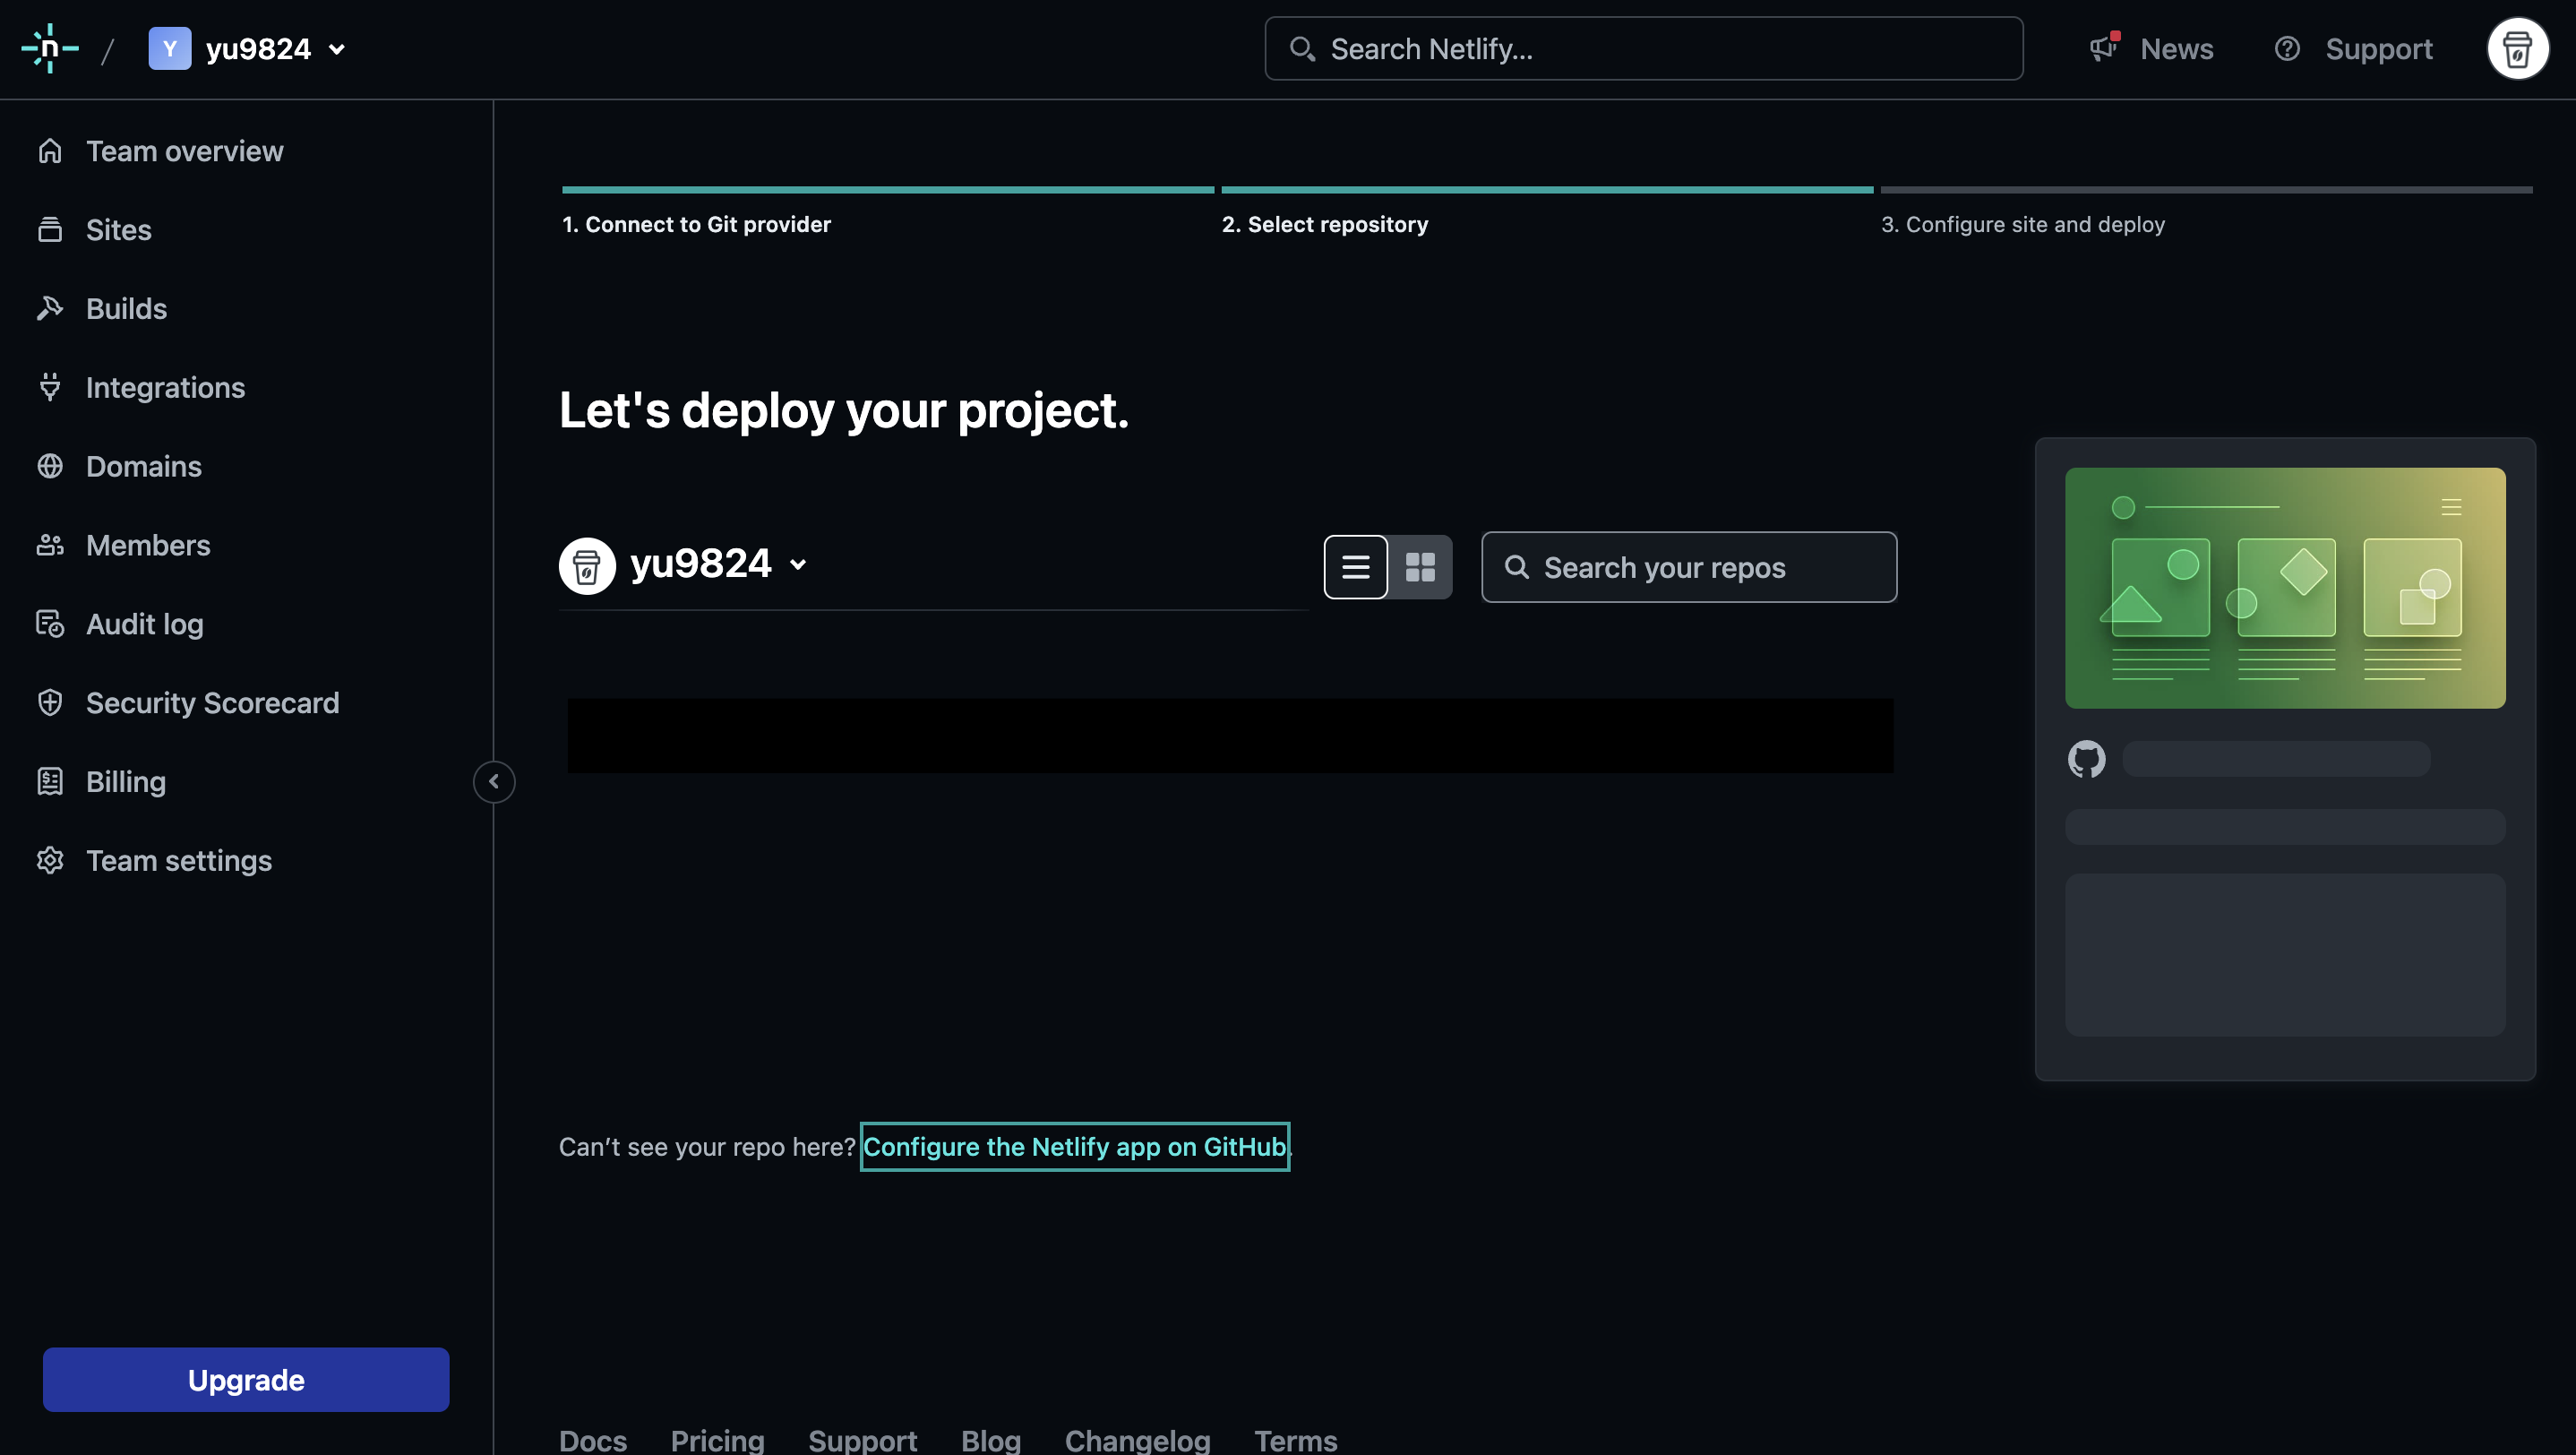
今回はGithubのリポジトリをベースに作成するため、 ‘Sites > Add new Site > Import an existing project’ から ‘Deploy with Github’ を選ぶ。
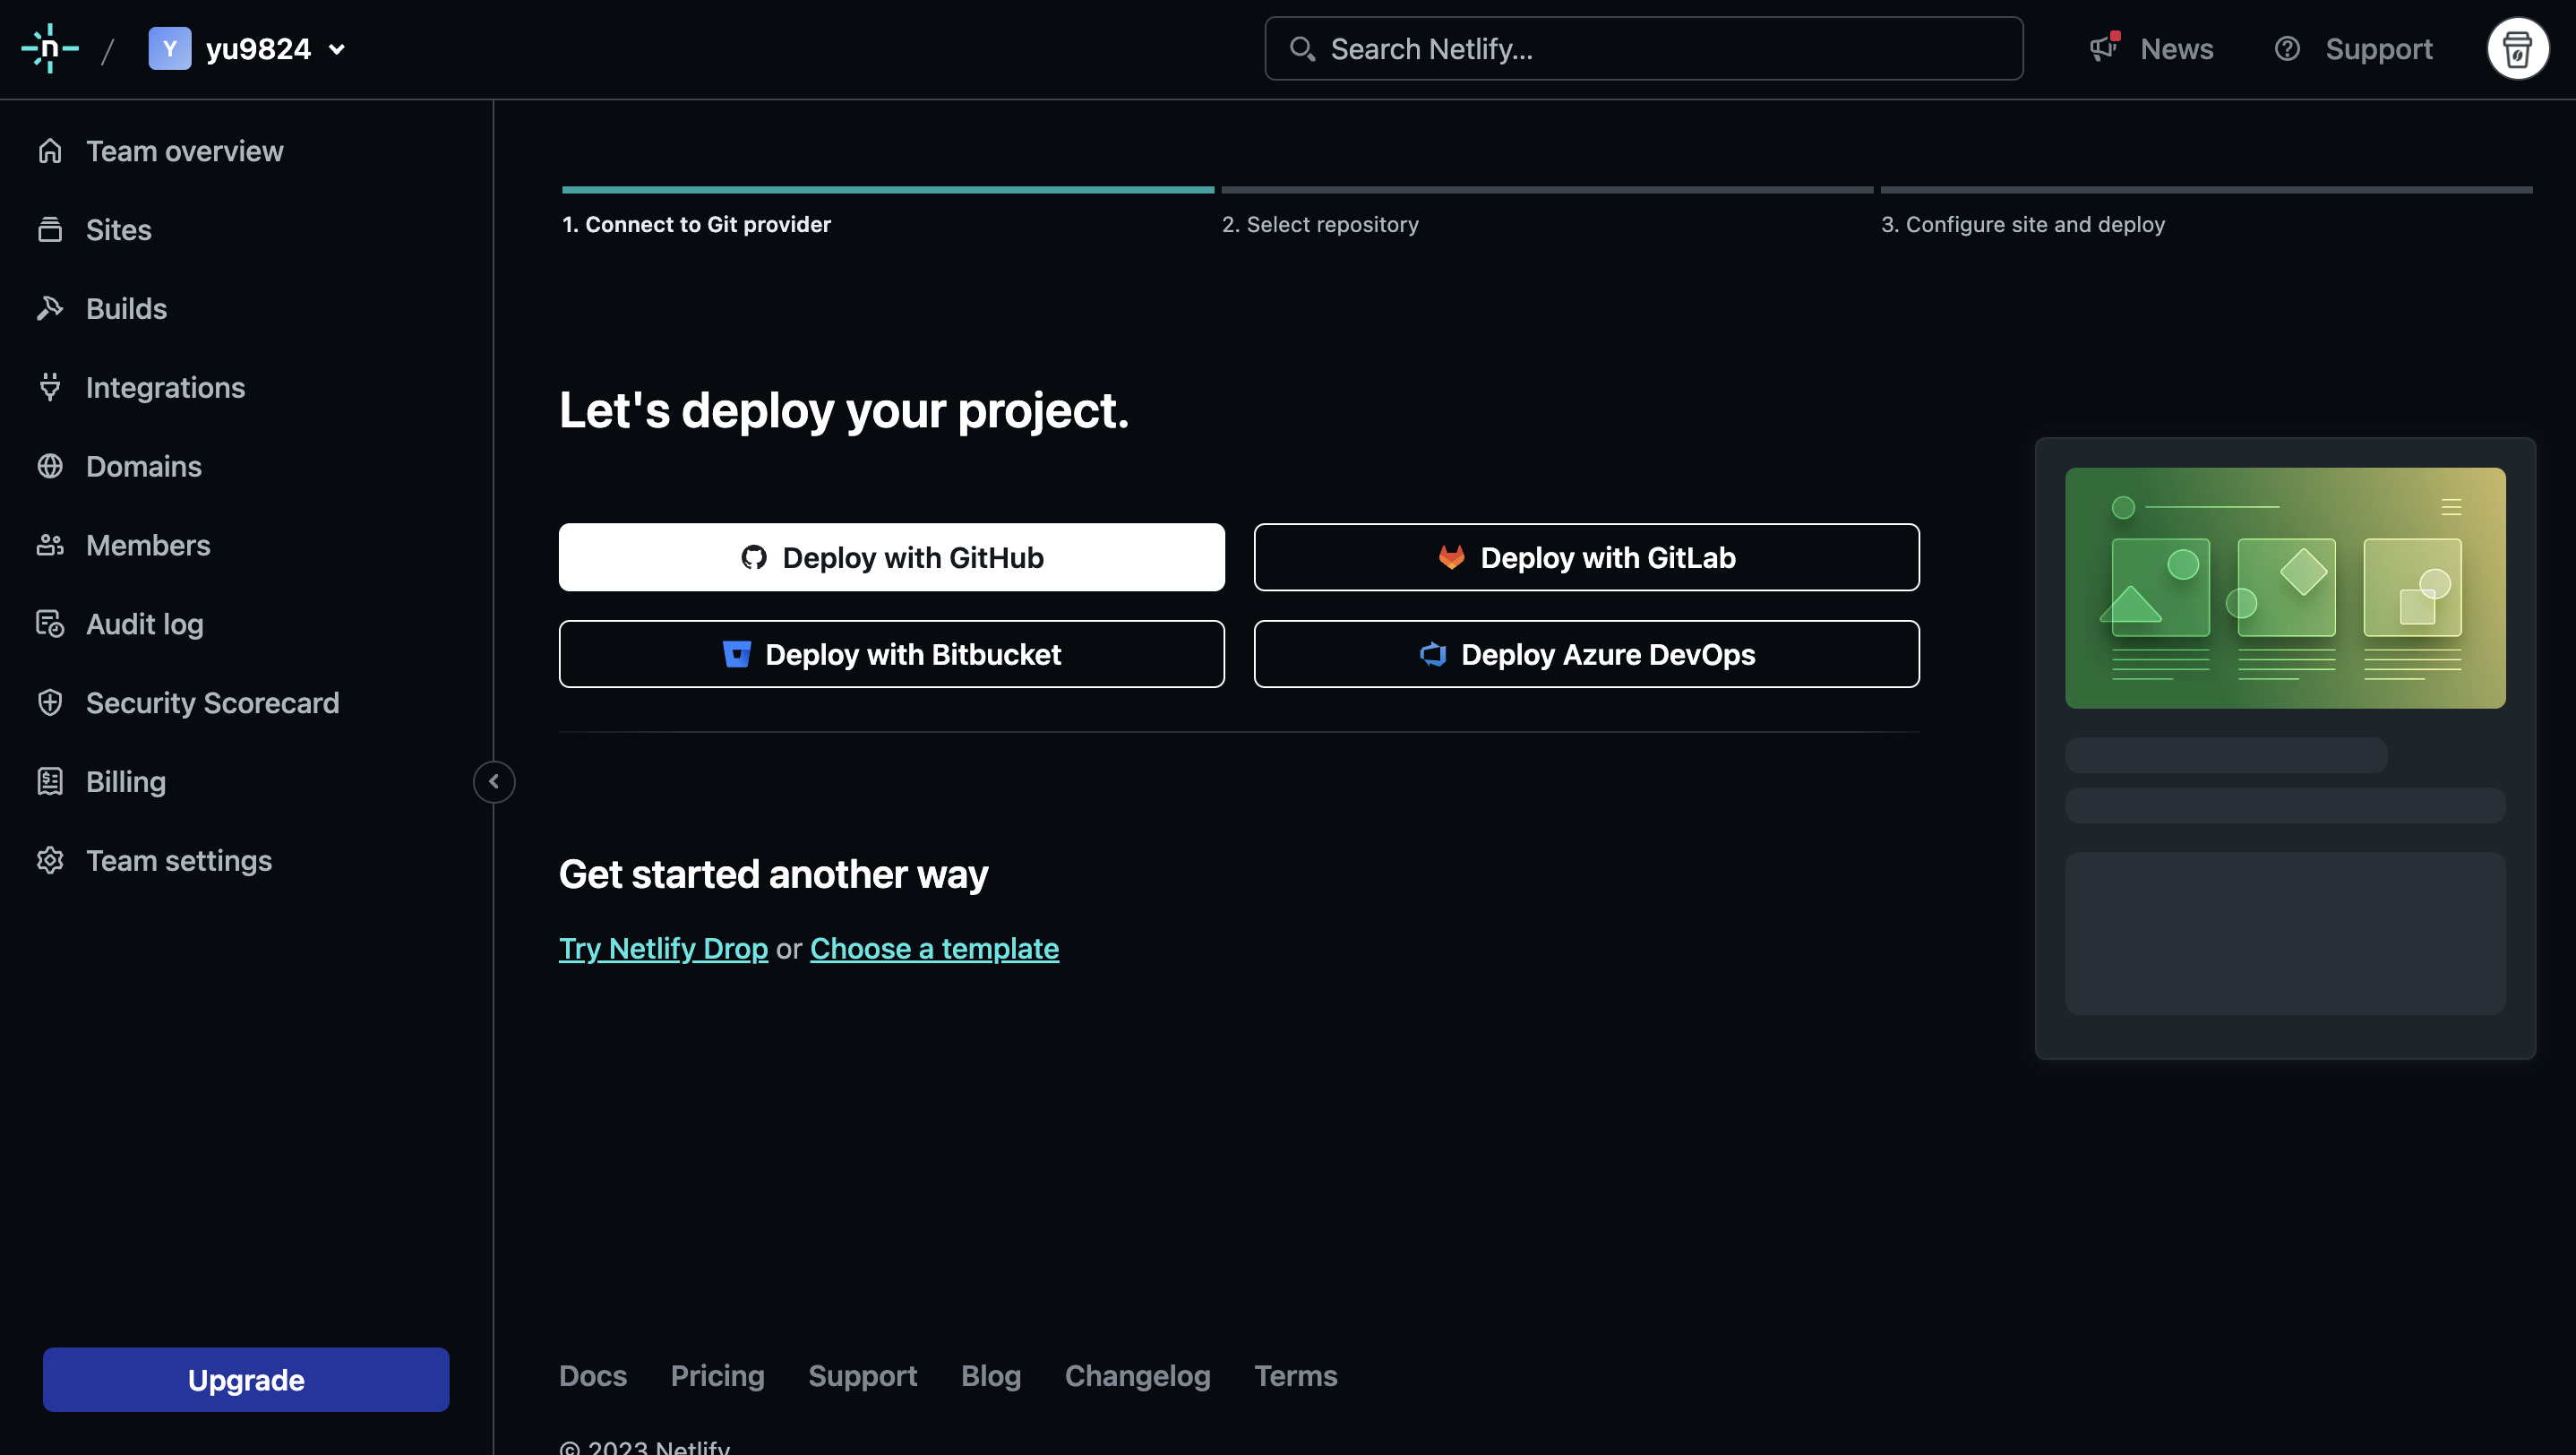
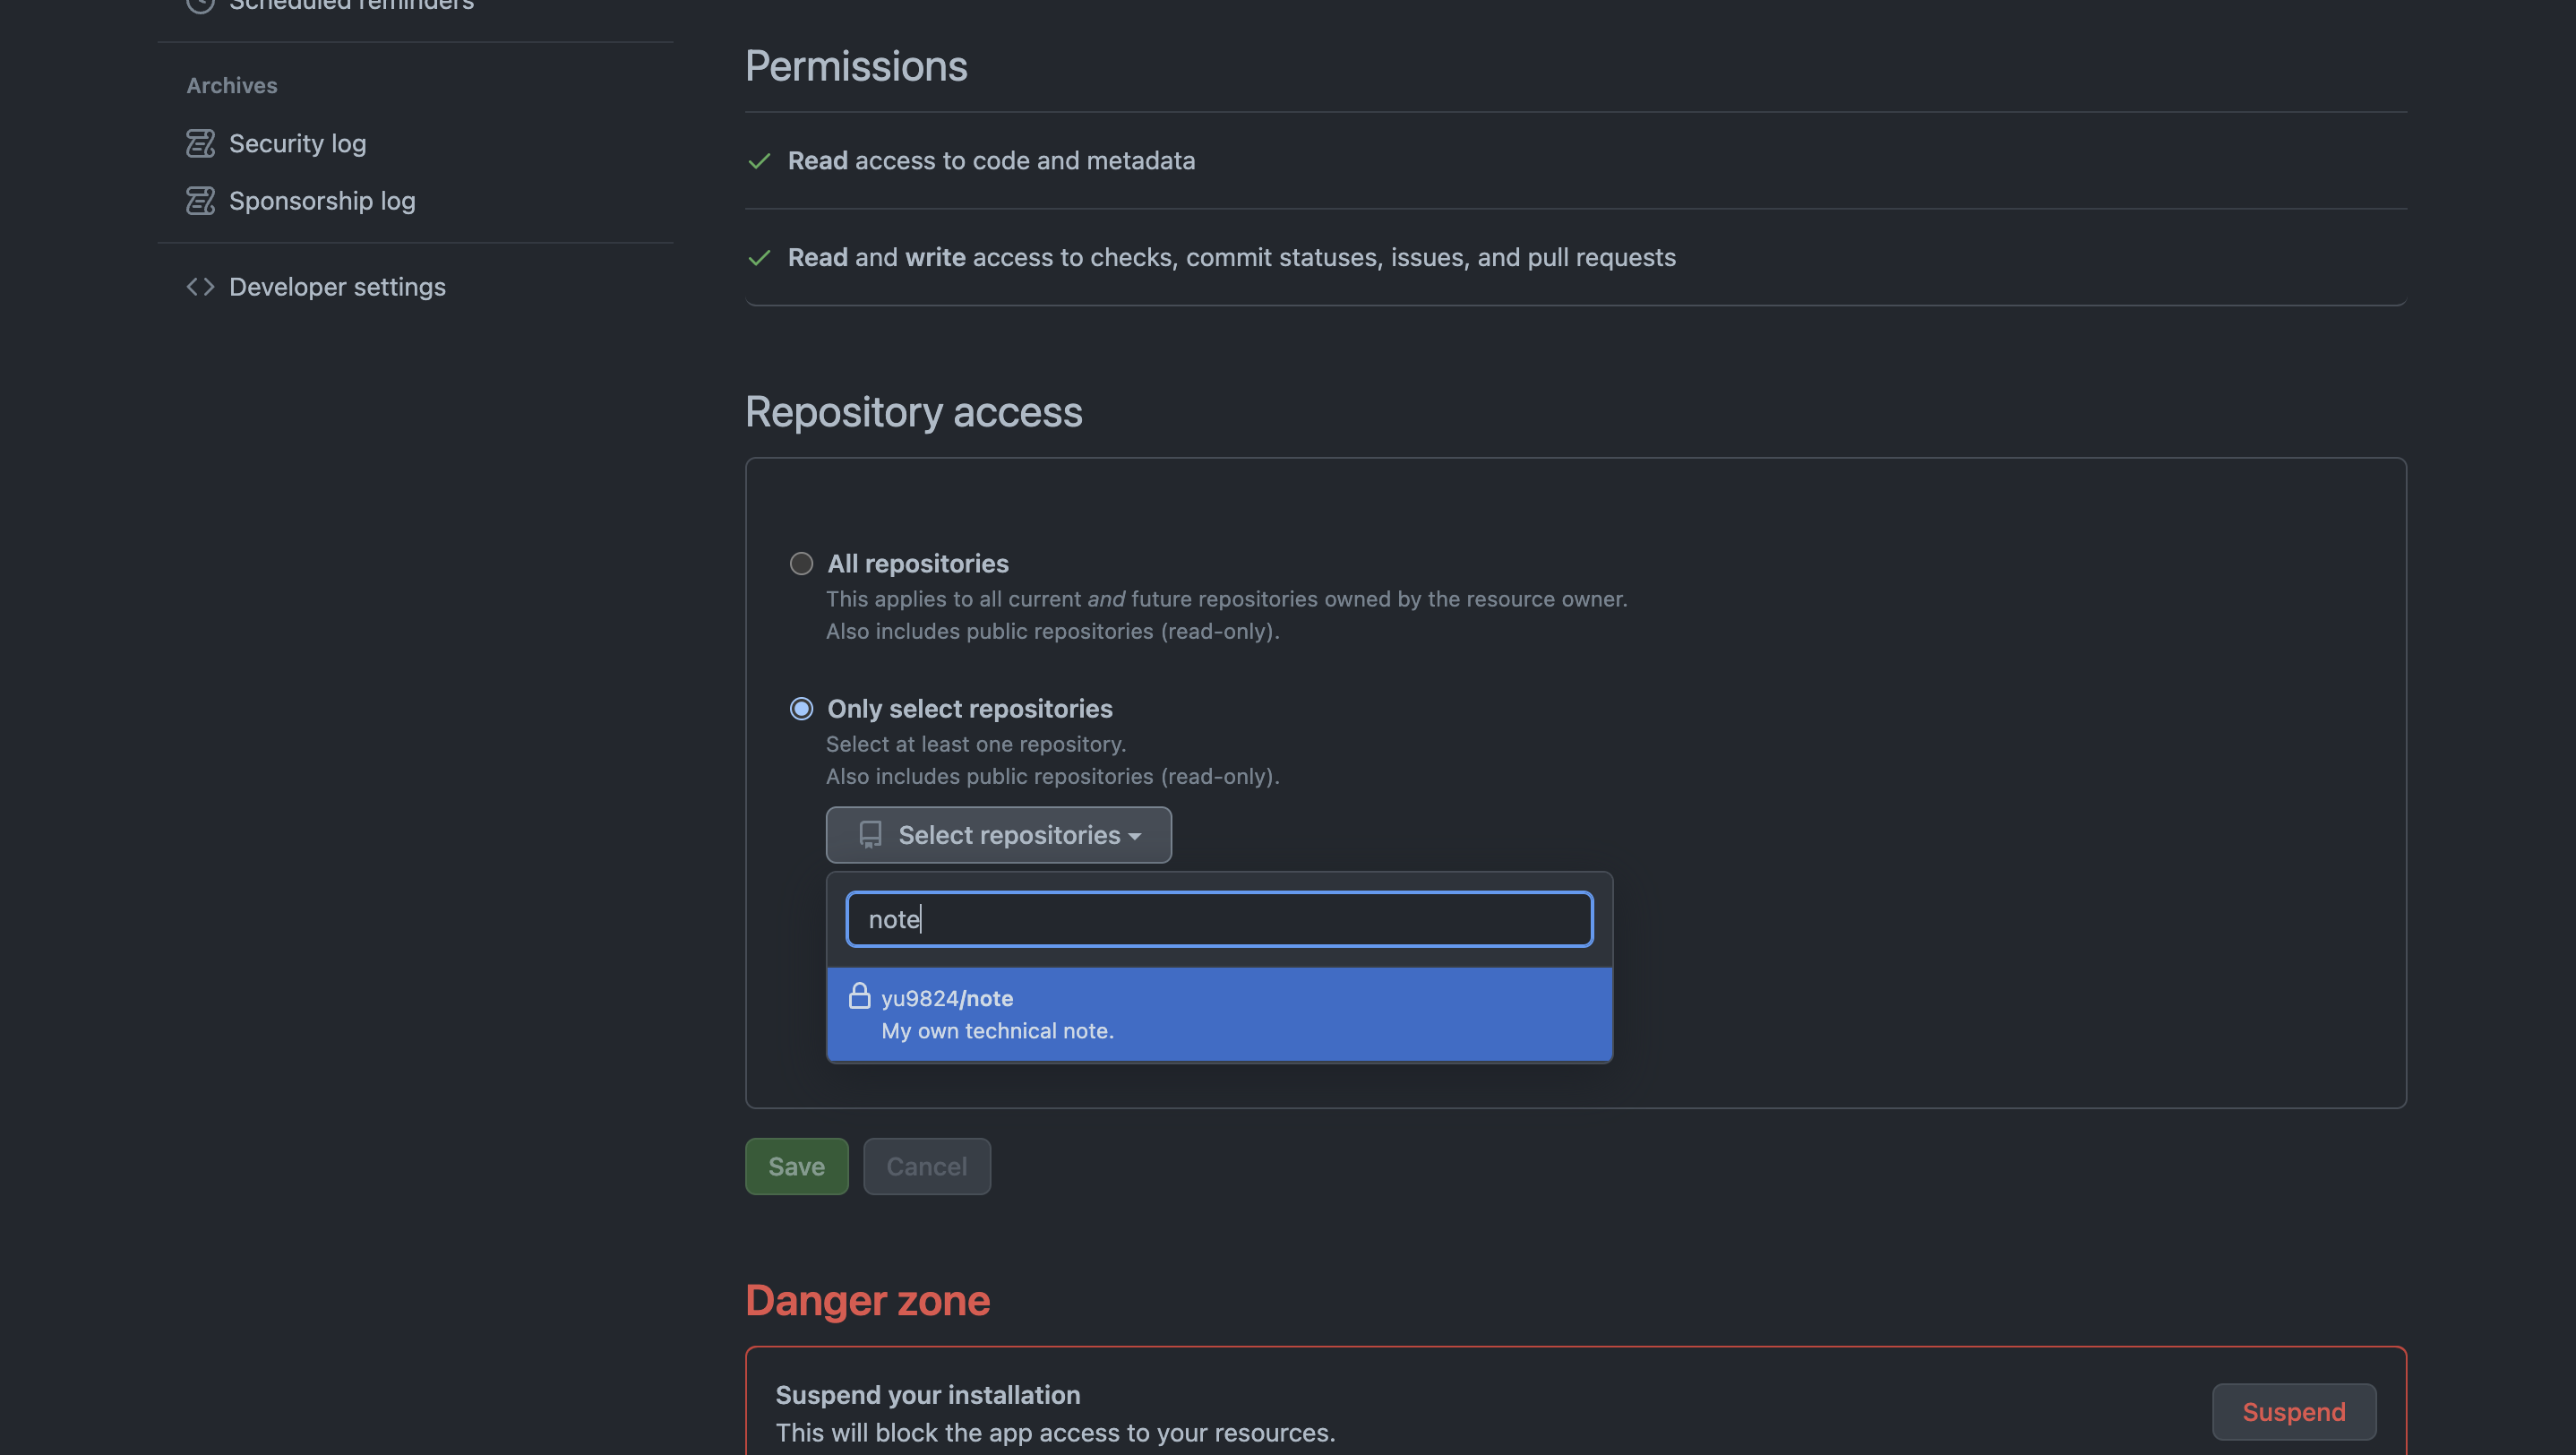
権限の設定次第では次の画面にリポジトリが表示されないので、 ‘Configure the Netlify app on Github’ をクリックしてレポジトリにアクセスできるようにする。
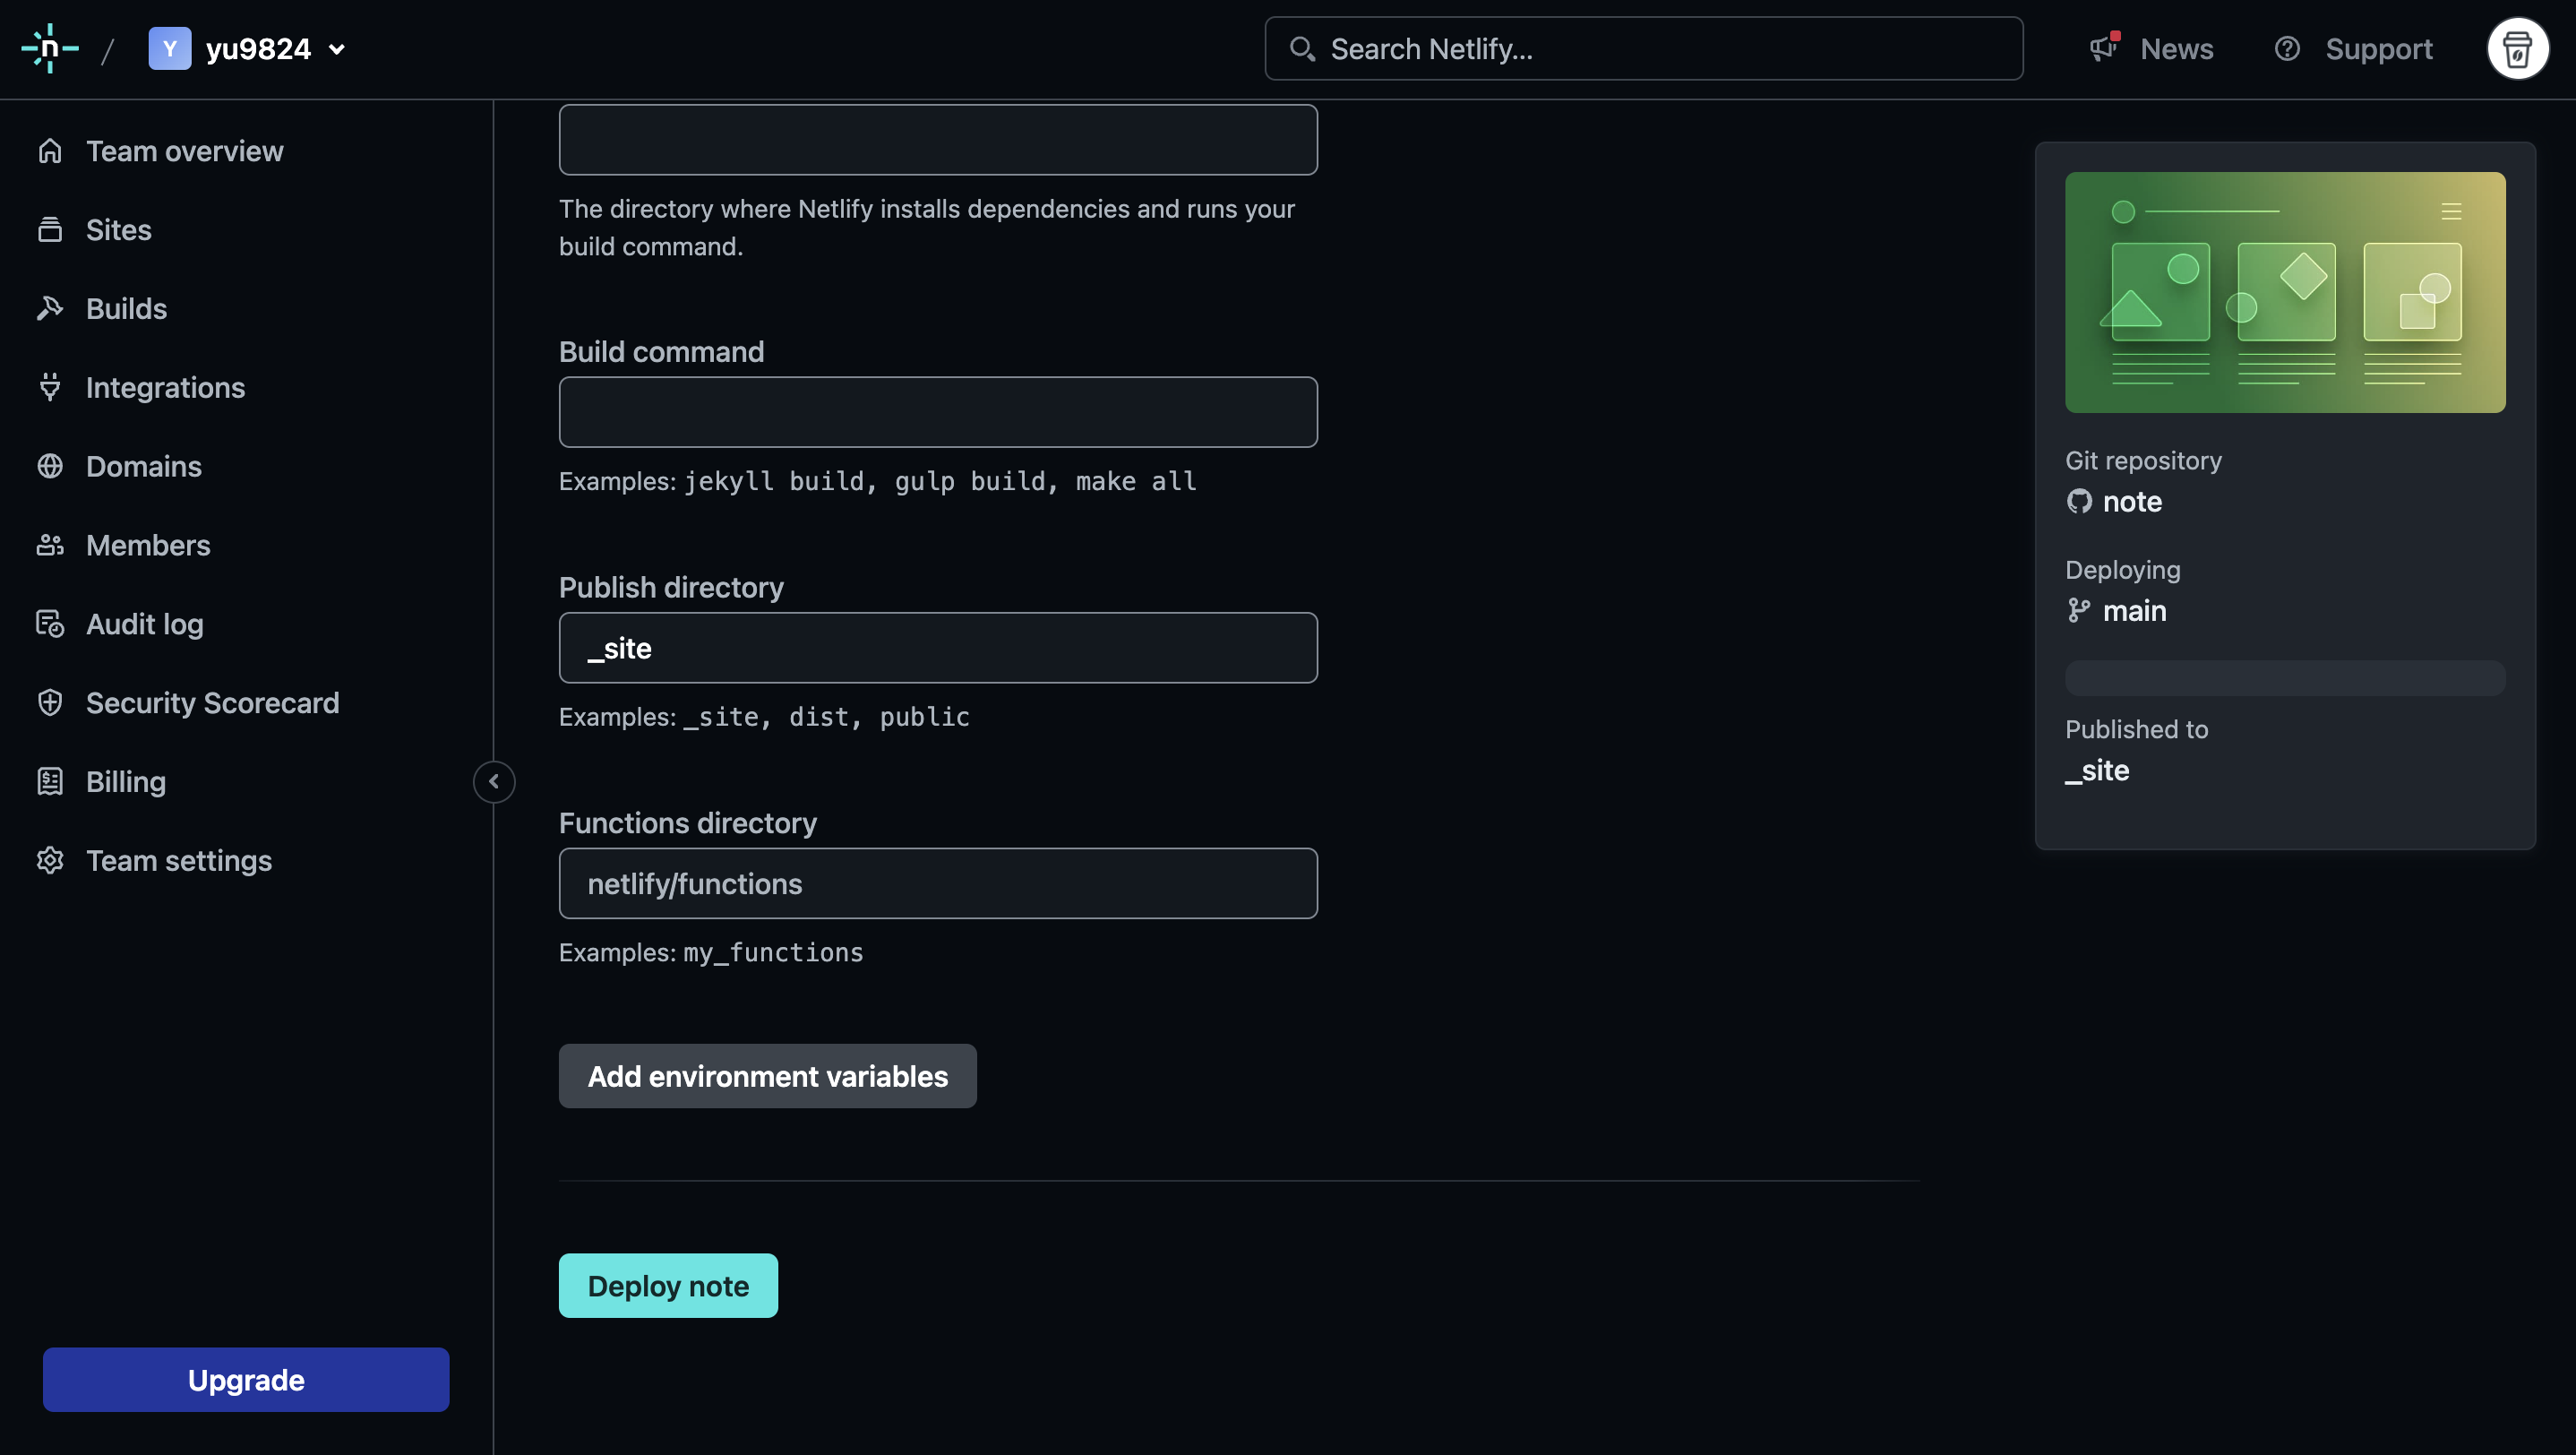
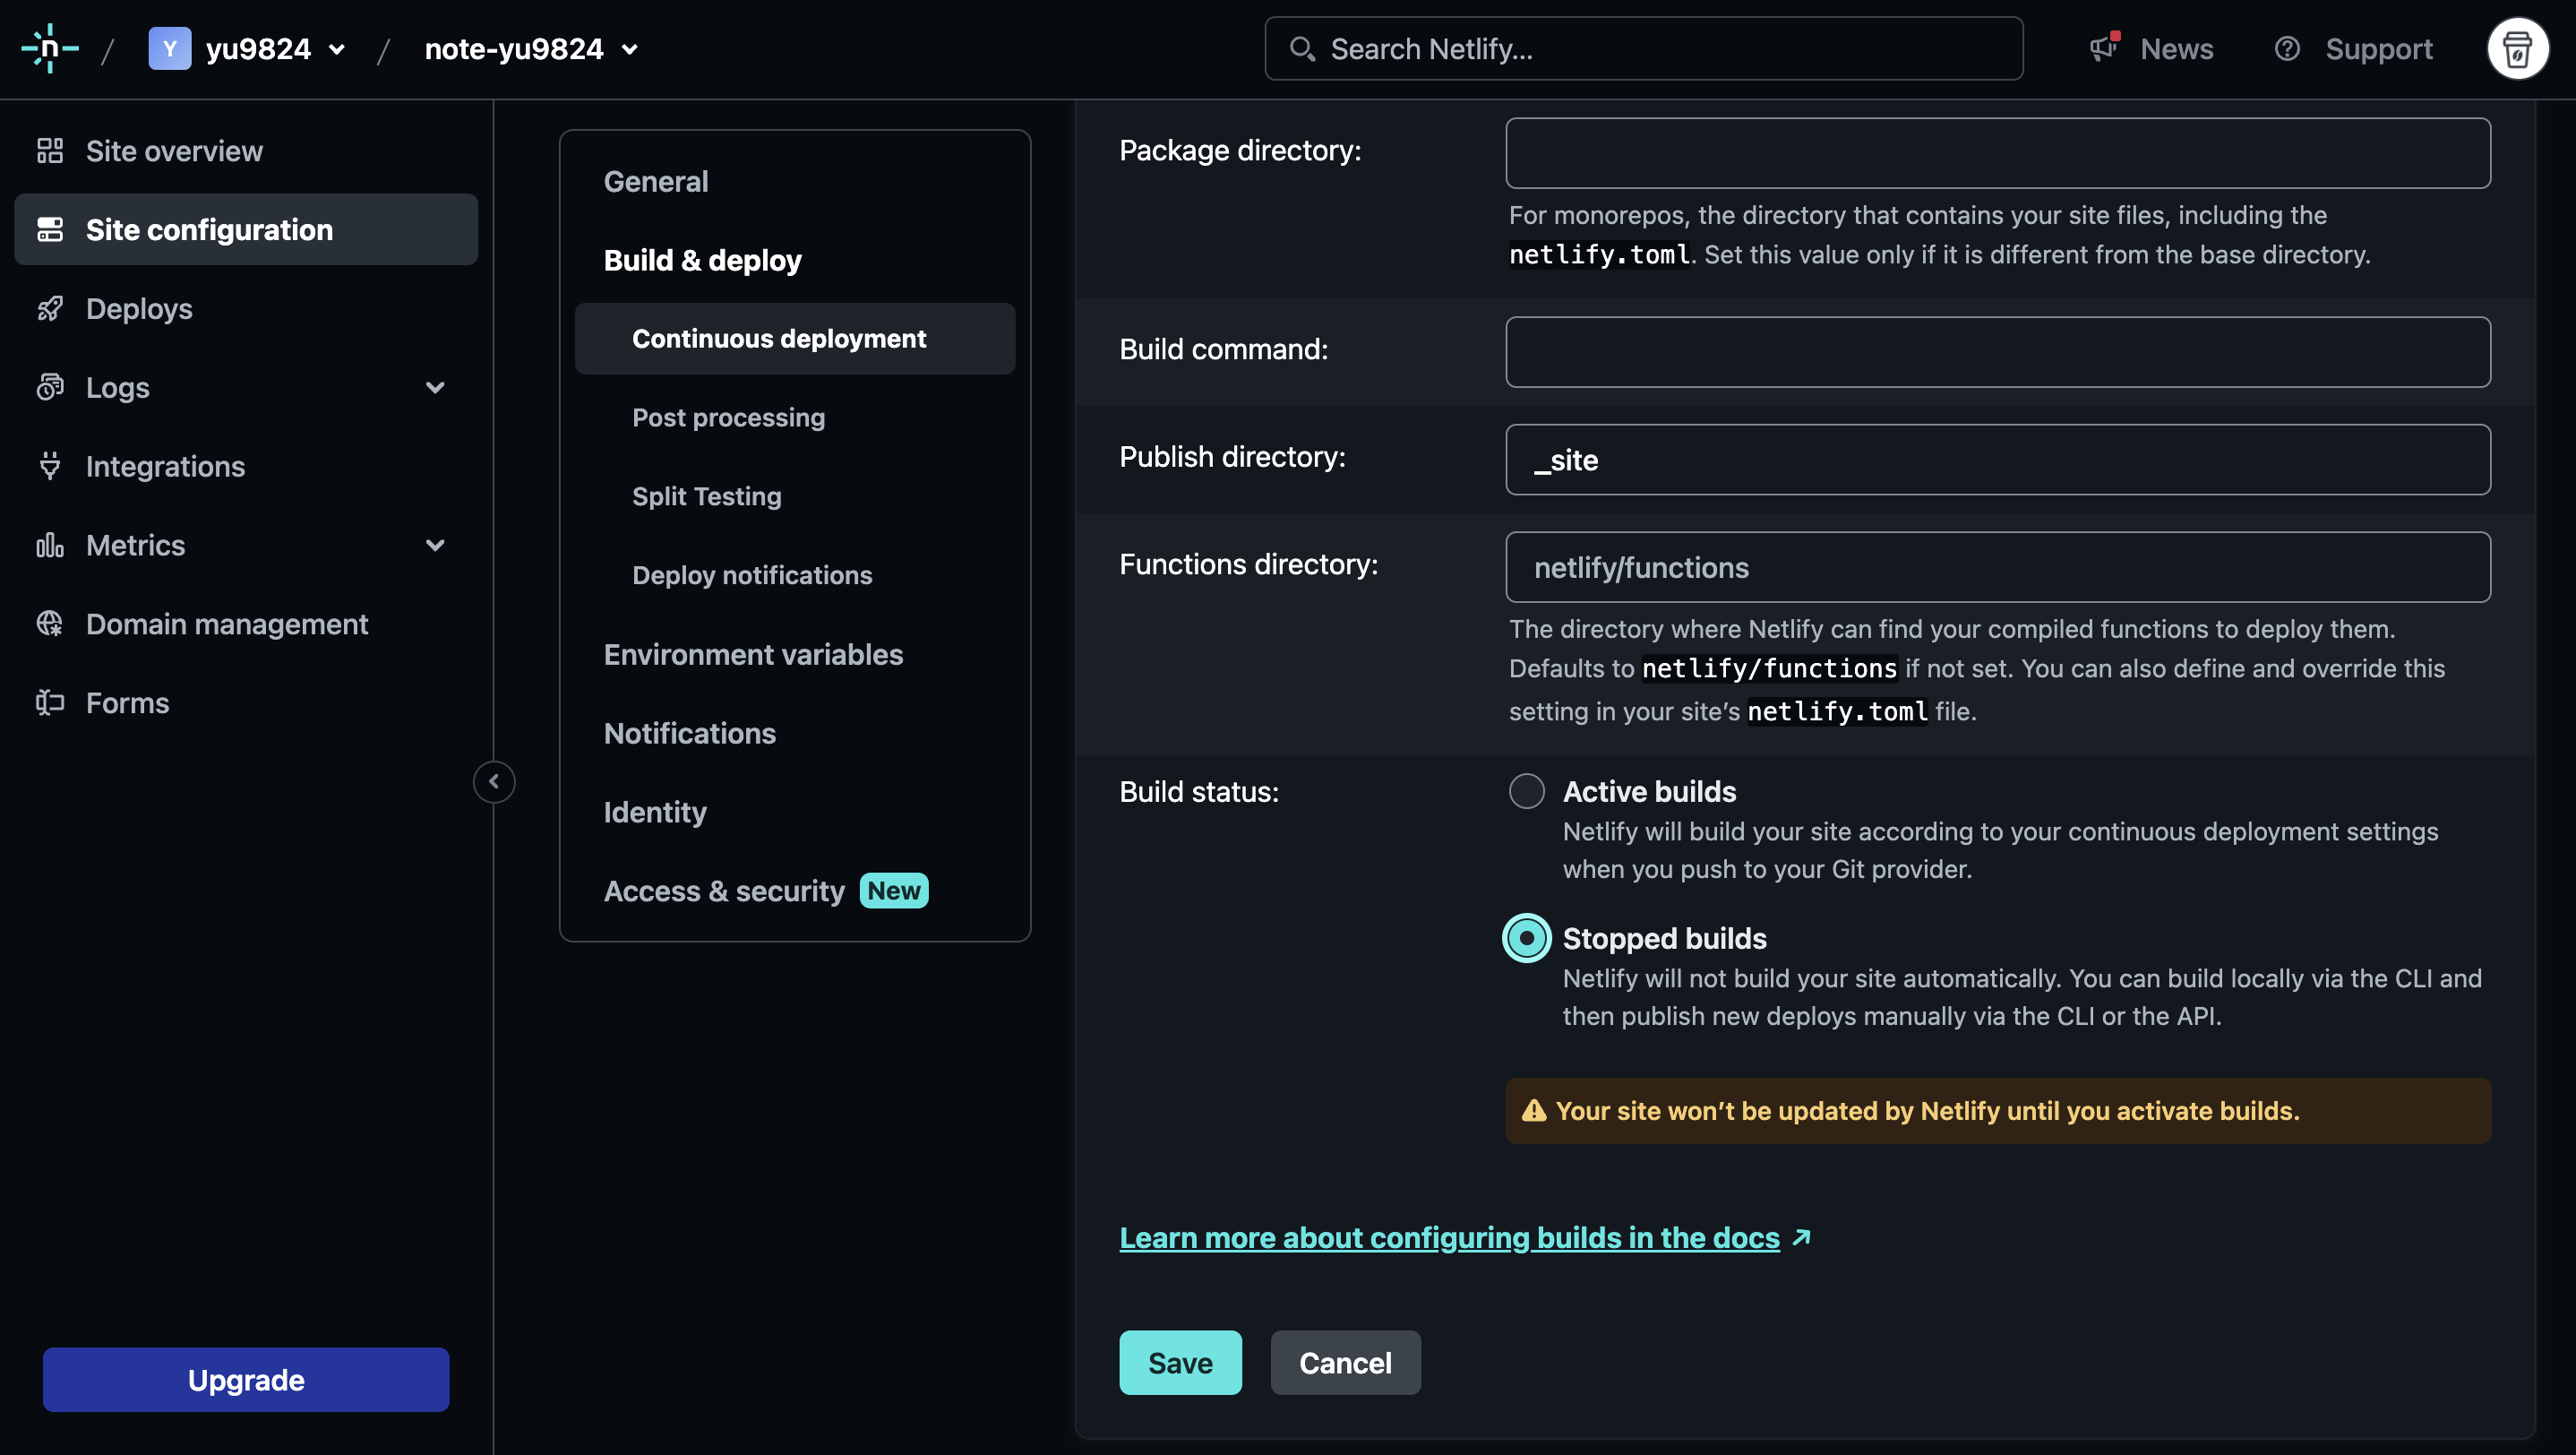
次にSiteのbuild等に関する設定を変更する。私の場合は下記。レポジトリの内容を勝手に認識して勝手に追加してくれていた。
今回の場合、BuildはGithub actionsで行うので念のため削除した (必要ない気もする)。
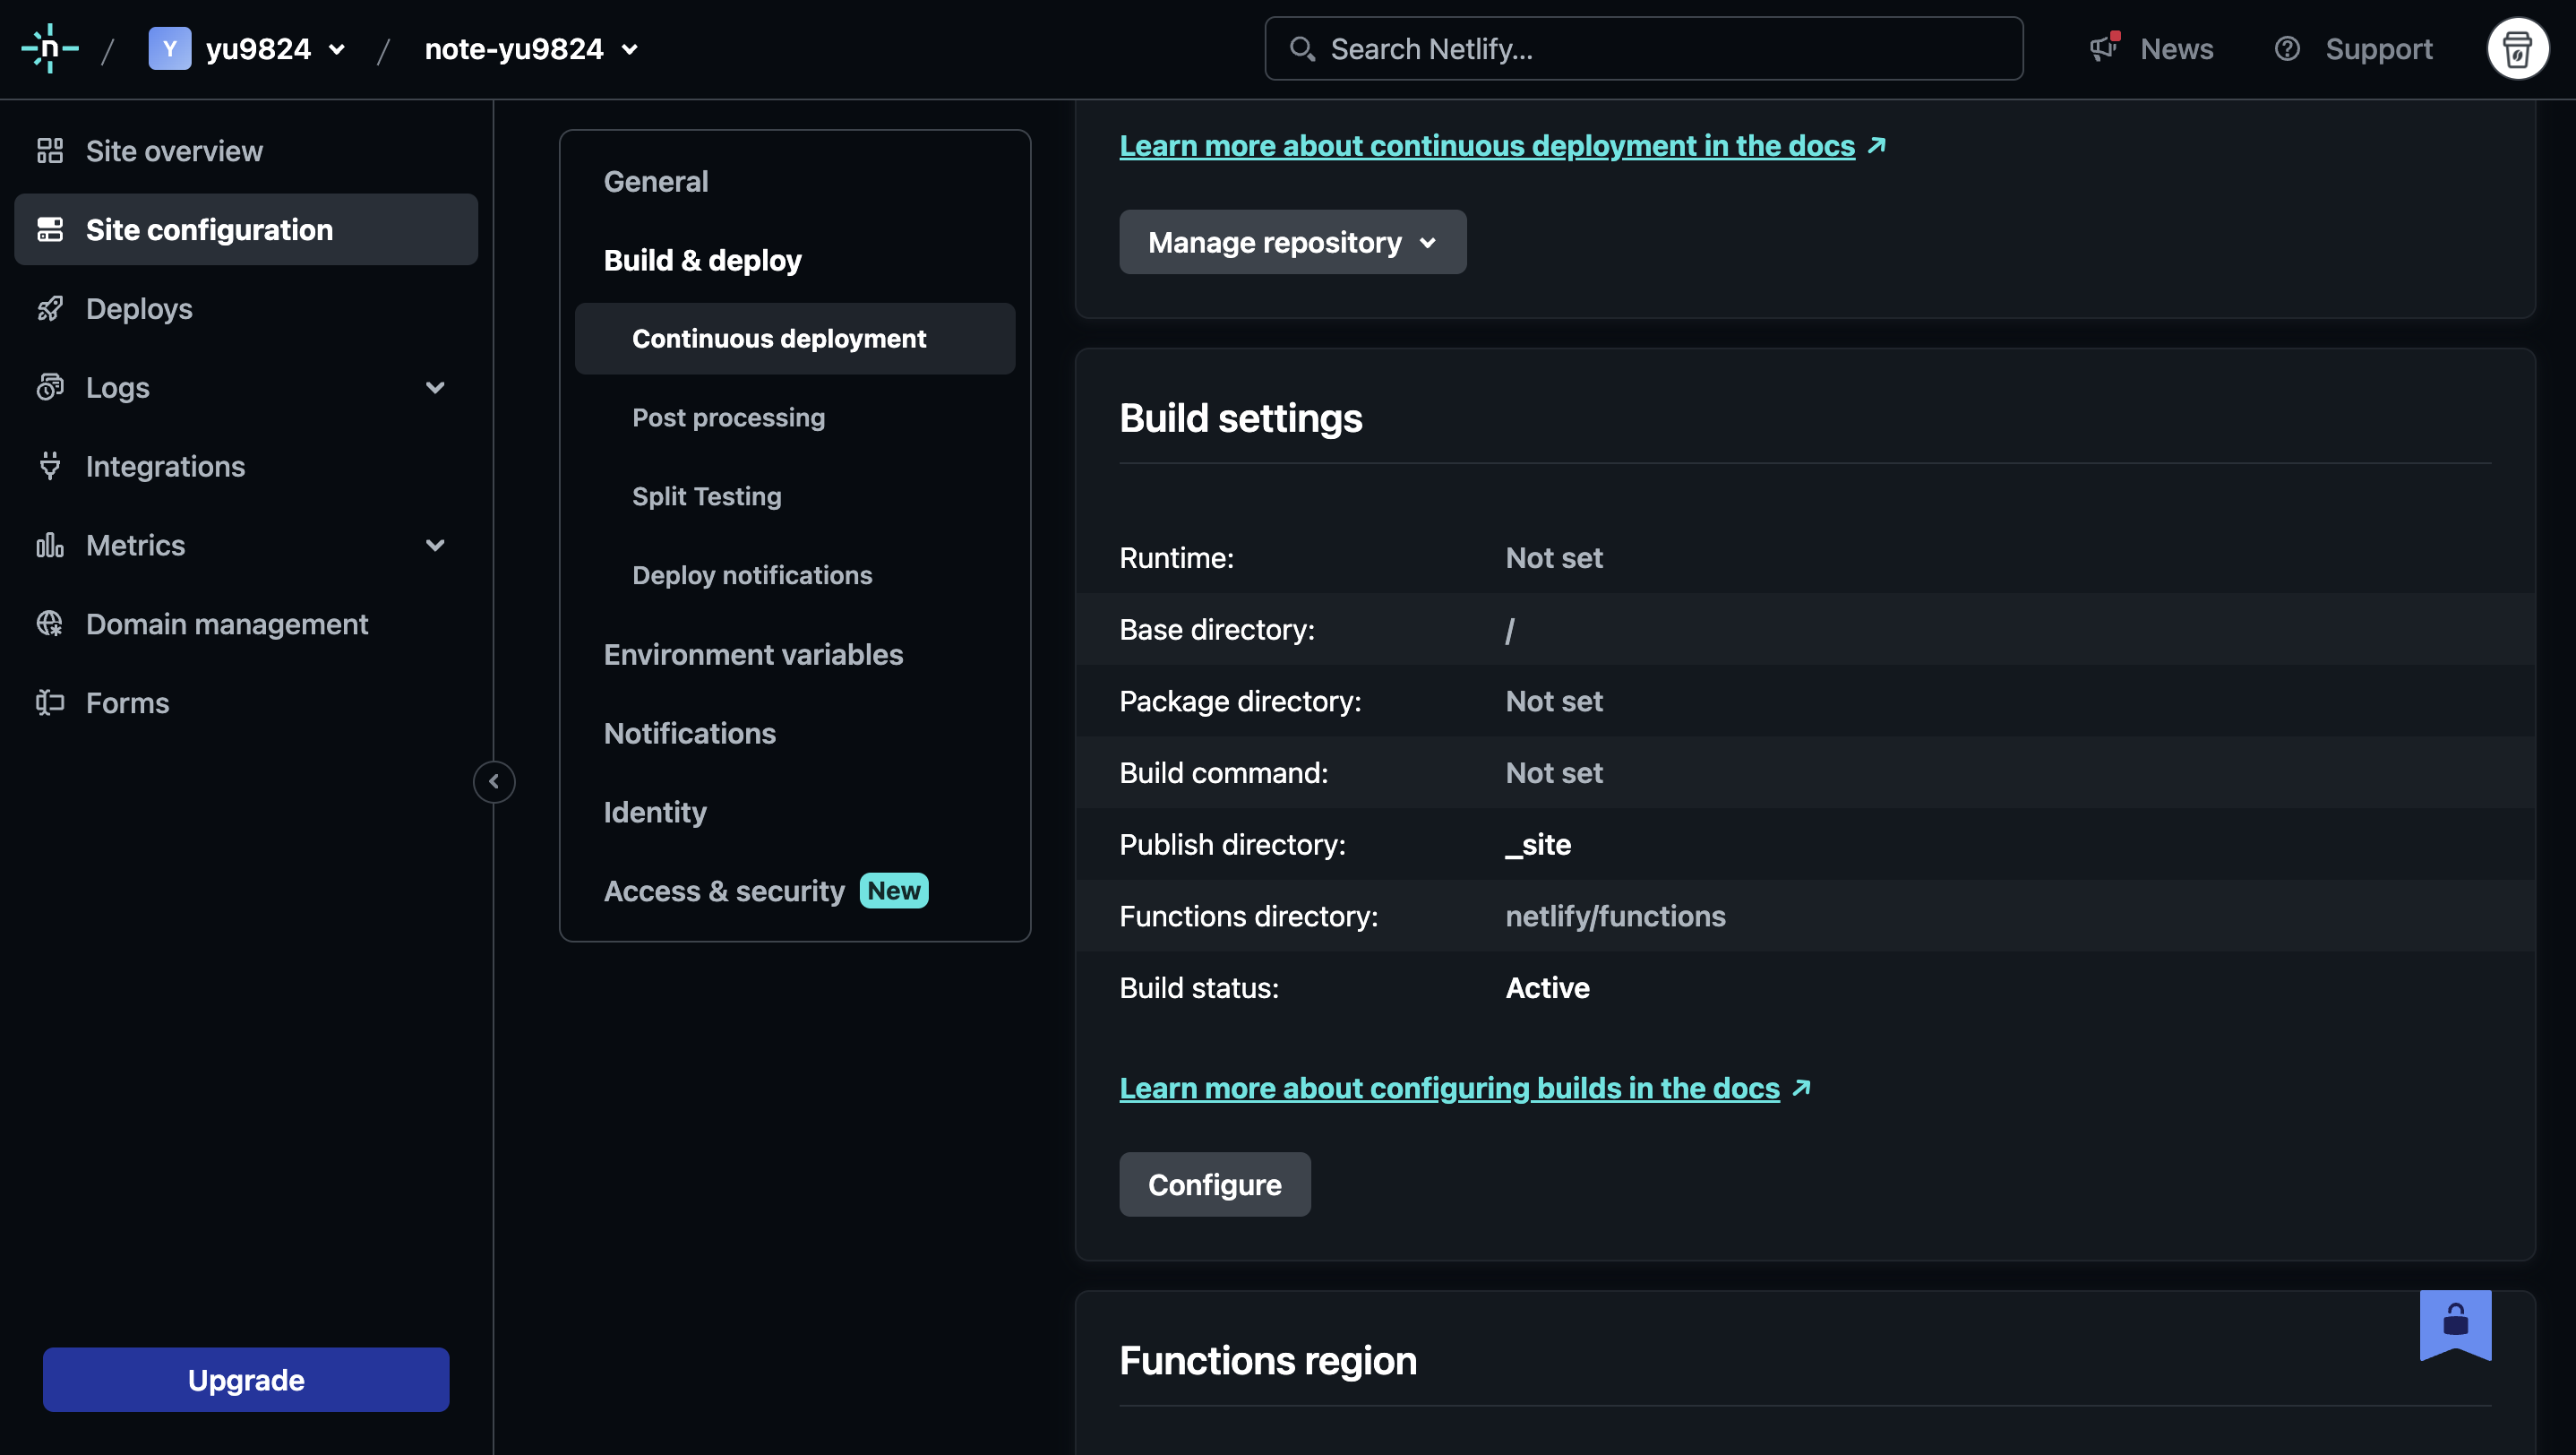
続いて、Netlify側での自動build & deployを停止するため、設定を変更する。
‘Site configuration > Build & deploy > Continuous deployment > build settings’ の ‘Build status’ を ‘Stopped builds’ に変更した。
Github actionsの設定
トークンの発行・登録
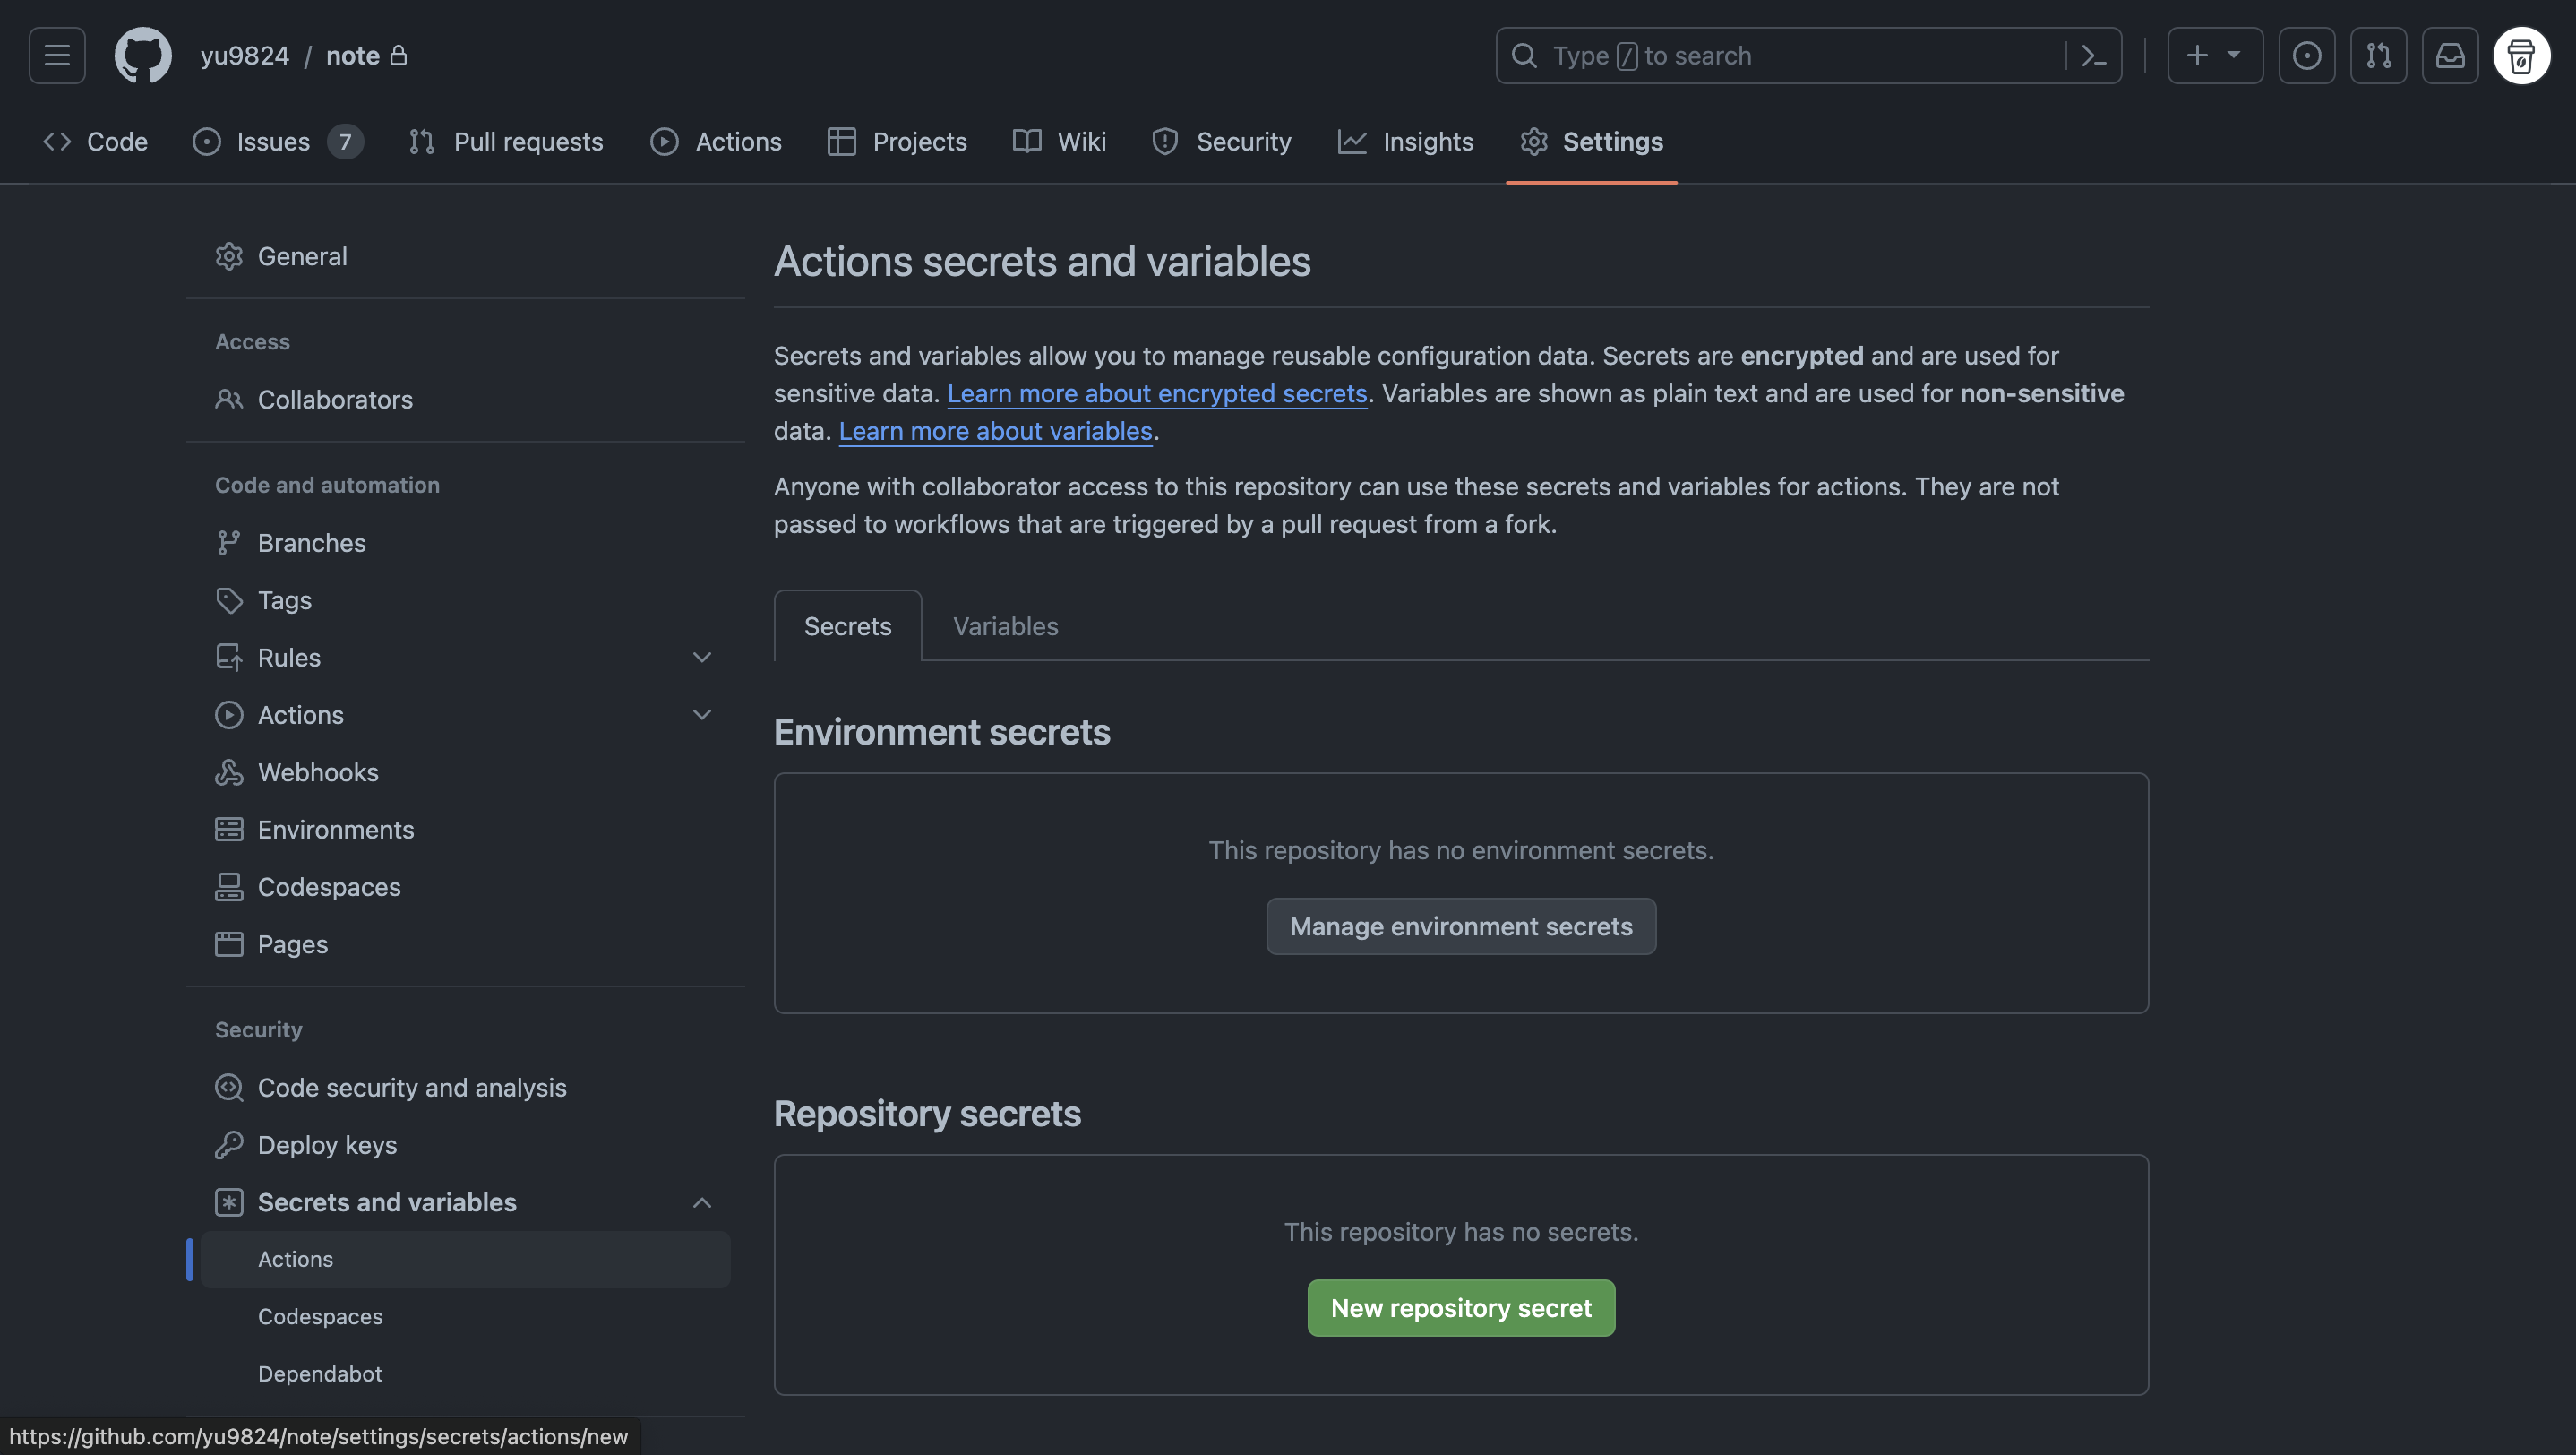
トークンは他人には知られてはまずいが、build & deployには必要なのでプライベート変数としてGithubに登録する。
リポジトリの ‘Settings > Secrets and variables > Actions > Secrets > Repository secrets’ に NETLIFY_AUTH_TOKEN と NETLIFY_SITE_ID を登録する。
NETLIFY_AUTH_TOKEN
User settings - Netlifyにアクセスして、 ‘User settings > OAuth > Personal access tokens > New access token’ より新しいトークンを発行する。
Description of your token は ‘deploy_note’ とした。
Expirationはこのトークンの有効期限なので、短い方が更新が必要で面倒だけどセキュリティ的に強いという感じ。お好みで設定。
NETLIFY_SITE_ID
‘Site configuration > Site details > Site information’ の Site ID。
Gemfileの生成
すでにあれば不要。
私はなかったのでGithubと同じJekyll環境を構築するために下記のGemfileをルートディレクトリに作成した。
source "https://rubygems.org"
gem 'github-pages', group: :jekyll_plugins
ワークフロー (yaml) の作成
私は、テスト用と本番デプロイ用の2種類を作成した。
テスト用
devブランチにpushされたときにビルドしてnetlify上でプレビューできるようにするワークフロー。
.github/workflows/build_and_deploy_test.yml
# Build by Jekyll and Deploy test to Netlify (dev branch)
name: Build and deploy test (dev branch)

on:
  workflow_dispatch:
  push:
    branches:
      - dev

jobs:
  # Build by Jekyll
  build:
    runs-on: ubuntu-latest

    steps:
      - uses: actions/checkout@v3
      - uses: ruby/setup-ruby@v1
        with:
          ruby-version: '3.1'
      - run: bundle install
      - run: bundle exec jekyll build
      - name: Upload artifacts
        uses: actions/upload-artifact@v1
        with:
          name: _site
          path: _site

  # Deploy test to Netlify
  deploy:
    needs: build

    runs-on: ubuntu-latest

    steps:
      - name: Clone the repoitory
        uses: actions/checkout@v3

      - name: Download website build
        uses: actions/download-artifact@v1
        with:
          name: _site
          path: _site

      - name: Publish
        uses: netlify/actions/cli@master
        with:
          args: deploy --dir=./_site --functions=functions
        env:
          NETLIFY_SITE_ID: $
          NETLIFY_AUTH_TOKEN: $
        timeout-minutes: 2
本番用
mainブランチにpushされたときにビルドして本番環境へdeployするワークフロー。
テスト用との違いは、デプロイ時に--prodオプションをつけたことと、トリガーとなるpushのブランチくらい。
.github/workflows/build_and_deploy.yml
# Build by Jekyll and Deploy production to Netlify (main branch)
name: Build and deploy (main branch)

on:
  workflow_dispatch:
  push:
    branches:
      - main

jobs:
  # Build by Jekyll
  build:
    runs-on: ubuntu-latest

    steps:
      - uses: actions/checkout@v3
      - uses: ruby/setup-ruby@v1
        with:
          ruby-version: '3.1'
      - run: bundle install
      - run: bundle exec jekyll build
      - name: Upload artifacts
        uses: actions/upload-artifact@v1
        with:
          name: _site
          path: _site

  # Deploy production to Netlify
  deploy:
    needs: build

    runs-on: ubuntu-latest

    steps:
      - name: Clone the repoitory
        uses: actions/checkout@v3

      - name: Download website build
        uses: actions/download-artifact@v1
        with:
          name: _site
          path: _site

      - name: Publish
        uses: netlify/actions/cli@master
        with:
          args: deploy --dir=./_site --functions=functions --prod
        env:
          NETLIFY_SITE_ID: $
          NETLIFY_AUTH_TOKEN: $
        timeout-minutes: 2
ここでmainブランチのpushまでを行い、きちんとNetlifyの本番環境にサイトが表示されていることを確認する。
独自ドメインの設定
Netlifyへの登録とGithub pagesから削除のどっちを先にすべきだったのか正確にはわかっていないが、私は以下の手順で行った。
Netlify上でドメインを追加する
‘Domain management > Production domains > Add domain alias’ で独自ドメインを追加する。
DNSをこのように設定してください、のような案内があるのでその通りDNSの設定を変更する。
私の場合は、すでに登録されているCNAMEをCNAME note note-yu9824.netlify.appに変更した。
Github pagesのドメインを削除
リポジトリの ‘Settings > Pages > Custom domain’ から独自ドメインを削除した。
私の場合はこれによりCNAMEファイルが削除された。
ついでに ‘Settings > Pages > Source’ のbranchをNoneに変えてGitHub Pages サイトの削除を行った。
リダイレクトの設定
Github pagesでは、独自ドメインを設定すると勝手にリダイレクトされるが、その仕組みはないので自分でその設定をする。
ルートディレクトリに以下の内容でnetlify.tomlを作成した。
[[redirects]]
  from = "https://note-yu9824.netlify.app/*"
  to = "https://note.yu9824.com/:splat"
  status = 301
  force = true

[[redirects]]
  from = "/index.html"
  to = "/"
  status = 301
  force = true
参考
【参考】拡張子なしURLへの正規化
これまでサイトのリンクは/filename.htmlに統一してきた。
.htmlいらないよなぁと思っていたら、jekyllの機能でそれらを統一する機能があったらしい。
_config.ymlに設定を書くことでpage.url等で得られるパスを 拡張子なし・ ‘/’あり に統一できる。
パーマリンクスタイル URLテンプレート date /:categories/:year/:month/:day/:title:output_ext pretty /:categories/:year/:month/:day/:title/
また、NetlifyにはPretty URLsという機能があり、/filename.htmlと/filenameを/filename/に統一 (リダイレクト) してくれる。
‘Site configuration > Build & deploy > Post processing > Pretty URLs’ から設定できる。
コメント
無事できてよかった。Github pagesと違ってリダイレクトの機能が充実しているのが良い。